Thursday, October 4, 2012

Film finished!!!

So now we are FINALLY finished with the film!!! Jippiie!
The premiere was at the AnimationVolda festival saturday 22 September, and everything went well!
The film was even selected as one of the 11 student films from the Nordic and Baltic countries 
to screen and compete at Fredrikstad Animation Festival, and we are super happy for that!


It was some hectic last days when we worked on the film, sleeping on the schools uncomfortable couch while rendering the film.


A big thanks to everyone who helped and supported us with the film. It has been a lot of fun and a lot of hard work. With both blood, sweat and tears. We worked so hard that Eirik woke up one day believing that the sun outside the window was a greenscreen, and Anna dreamt that she found her friend inside of a giant milk package. That is probably a sign that it is time to finish and take a break from the hard work.

Thanks!


Saturday, June 16, 2012

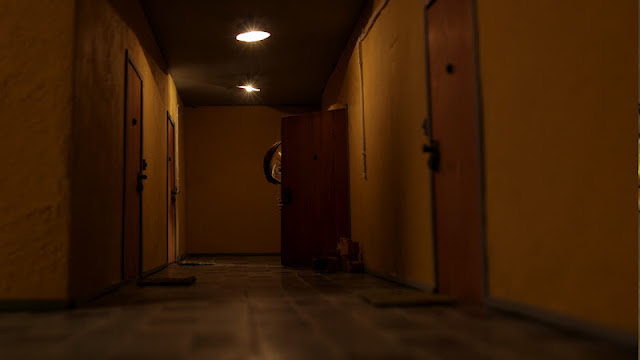
Hello! Im outside your door!


Hello! 


Just standing outside here letting you know that we're still working hard to get the film done! We have made a lot of progress lately and hope we can keep up this speed! So in the end we can show a teaser of what is coming! :)


Monday, June 4, 2012

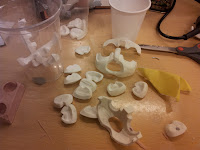
Making of the Puppet: Face replacements

Using face replacements gives the animator a small library of expressions, which can be combined together in a big variety on the puppet. For our story, it was really necessary to have this library so the mans expressions could more easily be shown, since the film relies mostly on body language and almost no dialogue.
It has been a while since we made the face replacements, 
but here is a small tutorial how approached it:


The inside of the head was carved from balsa wood, 
with a silicon eyesocket to keep the eyes in place. 

The head was then sculpted in Super sculpey firm and Milliput. The head was sculpted without
mouth shapes or eyebrows, the upper jaw helped the moth to later be sculpted in right place.
The parts that were to be replacable were then cut out. 
Imperfections where then fixed smoothed out with milliput and sandpaper.


We made a silicone negaive for each part. The different parts were then casted in plastic.


We made two versions of the main character so that we could animate on two sets at the same time. 
Magnets were used to keep the parts in place.

Different expressions where then sculpted on top of the parts.


Layers of white spray where applied before painting the final color.


Credits to Joshua and Nathan Flynn, 
who shared their way of making face replacements on their blog.

Friday, June 1, 2012

Character Design


We are still busy animating the last scenes, so meanwhile here is the design developement of the characters!
The man is the one that has been through most changes. We wanted him to be anonymous, but yet personal, he should be a loner but yet lovable. And most of all he should look stressed like he has problems and a lot of things going on in his head.
The creature looks naive and clumsy. He looks cozy, but is annoying and scary to the man. We find this contrast humouristic. He was the first character to be designed, and his design was nailed very early. 
Both directors worked on character design, and some of the creature sketches is by Frode.


Monday, May 28, 2012

Screenshots from the film

Since we don't have time to publish any longer posts this week, 
here are three screenshots from the film!


Wednesday, May 2, 2012

We built this City

Here is a miniature city we built in cardboard.
Some pics and text explaining the process:


For building the houses we just used different cardboard that we could find and gluegun. 
The houses has only three walls - we won't see the fourth 
and it is also easier to light them from inside then.

The houses where built in differnt sizes to create 
an illusion of perspective/fake perspective.

Some of the houses where covered in putty and lightly sandpapered.

Then painted in different grayish desaturated colours.

 
( Sometimes we also clean up)


Here is the houses putted up for shooting. 
The background is the same as in the train exterior shots, 
but without the orange light behind (since its still night here).

The mountains is made by styrofoam.

This is how the set looks from behind.
We covered some of the windows and then had lamps behind every row of houses.
The aluminium foil is to cover cracks where the light slipped through.


For this shot we made a miniature animatable version of the character. Challenging and fun to animate!


And some photos with the finished lighting.